|
Warning
|
Danger to life due to electrical shock
There is a risk of fatal electrical shock when working on devices in the switch cabinet with 230 V mains voltage. ▷ Operations in the switch cabinet may only be carried out by qualified electricians. ▷ Before carrying out any operations in the switch cabinet, switch off the power supply properly. |
|
Caution
|
Damage to the device due to electrostatic discharge (ESD)
Electronic components can be damaged by electrostatic discharge. ▷ Observe appropriate ESD protection measures. |
|
Note
|
RevPi Connect 4 and RevPi Connect 5 are equipped with an integrated lithium battery. The battery has a guaranteed service life of 10 years. Do not replace the battery yourself during the warranty period of the RevPi device. If you experience problems with the battery during the warranty period, contact KUNBUS customer service: support@kunbus.com. If the battery cannot be replaced or a problem occurs while replacing it, also contact KUNBUS customer service. |
The CR2032 battery supplies the Real-Time Clock (RTC) when no power supply is connected to the device.
You require:
✓ A small flat-blade screwdriver
✓ A pair of tweezers
Follow these steps to replace the battery:
▷ Disconnect the RevPi from its power supply.
▷ Remove all connected cables and connectors, e.g. network cables, USB cables, PiBridge or ConBridge.
▷ Remove the RevPi from the DIN rail.
▷ Use the flat-blade screwdriver to unlatch in the four latches (two at the top and two at the bottom) on the front of the housing (1), two at the top and two at the bottom.
▷ Remove the front of the housing. This releases the black cover next to the upper X2 connector.
▷ Pull out both black locking clips (2) on the back of the housing to the first locking position.
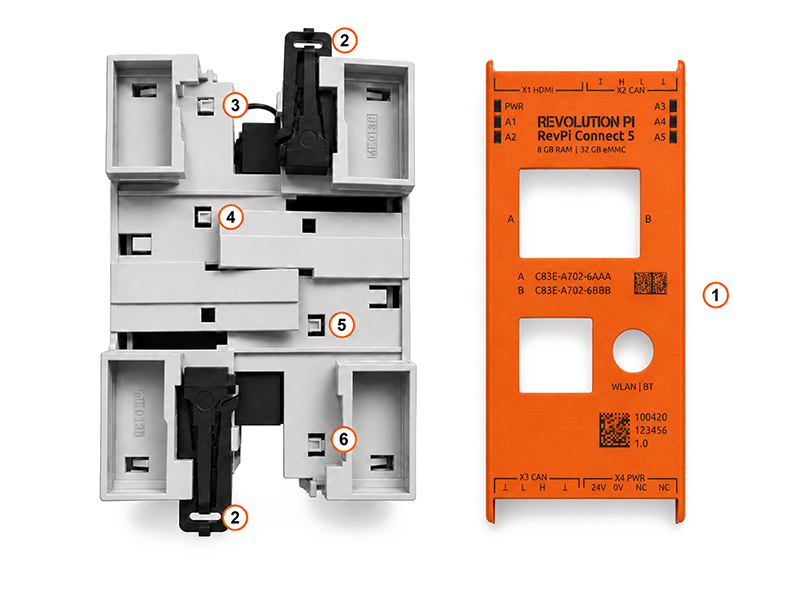
▷ Press in the latches on the back of the housing one after another:
-
the latch behind one locking clip (3),
-
the two middle latches (4) and (5),
-
the latch behind the second locking clip (6).
▷ Carefully pull the housing halves apart. Open the housing only far enough that the connecting cable (7) between the housing halves is not damaged.
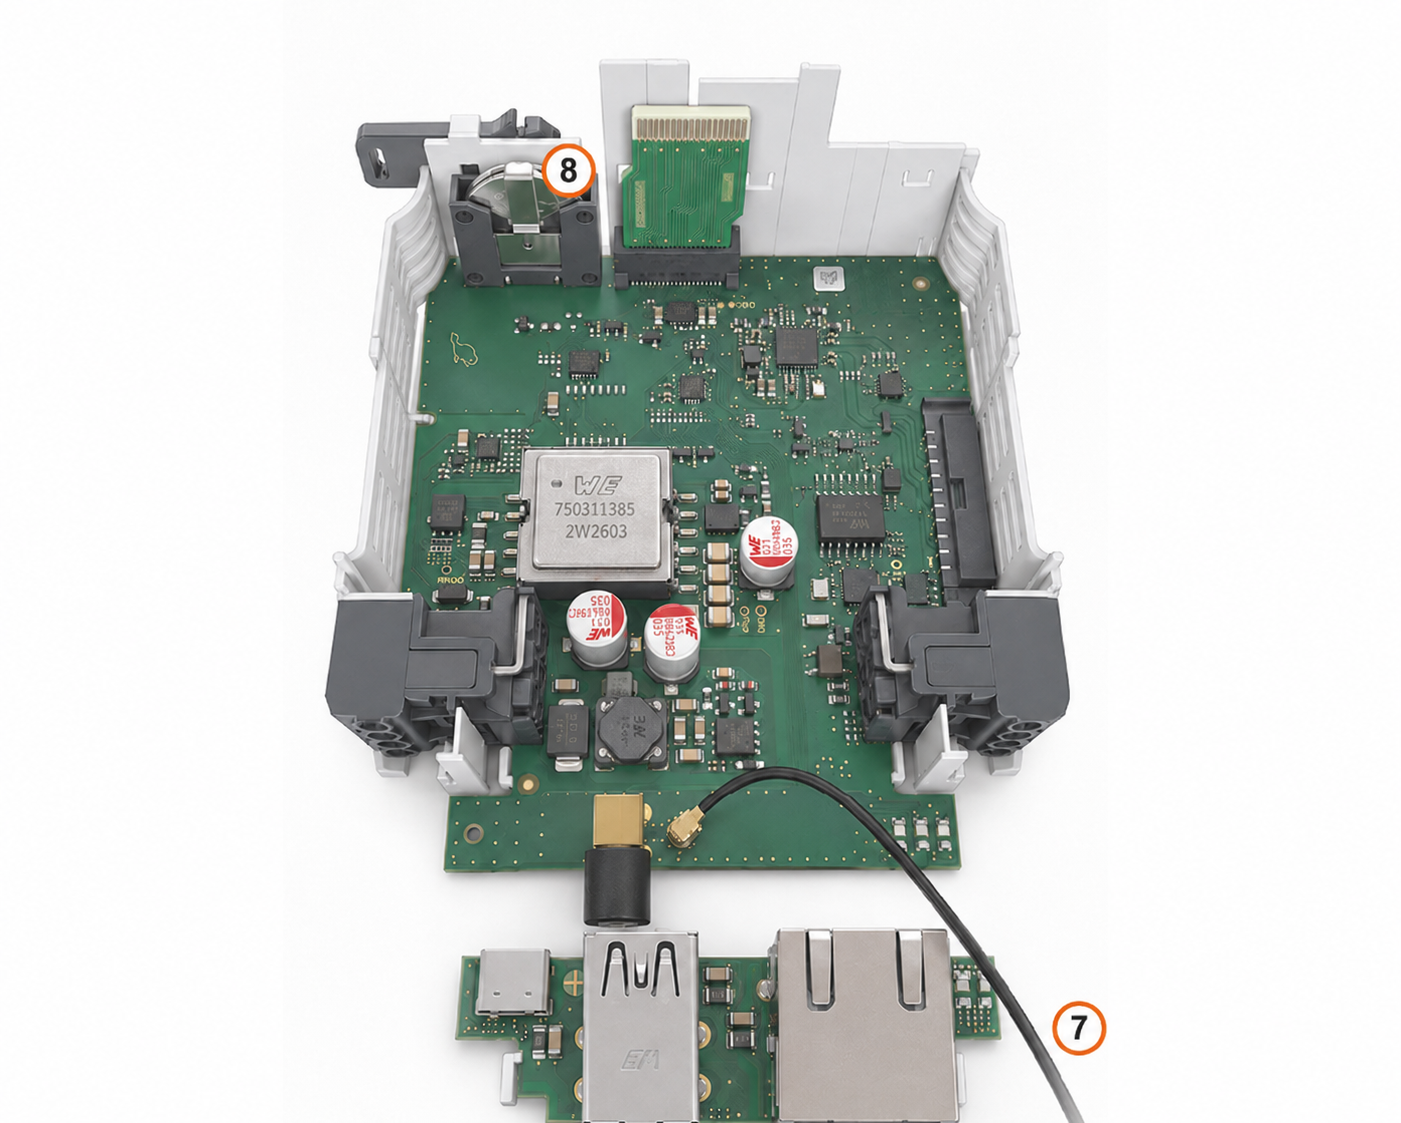
▷ Use the tweezers to remove the CR2032 lithium battery (8) from the battery holder.
▷ Insert a new CR2032 lithium battery. Make sure the polarity is correct:
-
Positive terminal faces the inside of the device.
-
Negative terminal faces the housing wall.
▷ Carefully align the two housing halves. Make sure the connecting cable is not pinched.
▷ Press the housing halves together until the latches engage.
▷ Reattach the front of the housing and press it until the latches engage.
▷ Reinsert the black cover next to the upper X2 connector.
▷ Press both locking clips completely into the housing.
▷ Remount the device on the DIN rail.
▷ Switch the power supply back on.
▷ Check the system time.
-
If NTP is enabled, the time is synchronized automatically once the network connection is established.
-
If the RTC is used without NTP, set the system time again.
▷ Dispose of the empty battery in accordance with local regulations.