After learning about the RevPiModIO library in our Python tutorial, let’s enhance your development workflow using RevPi Commander - an open-source tool pre-installed on your RevPi. This tutorial shows you how to use RevPi Commander to streamline your Python development, from configuring your hardware to deploying and monitoring your applications.
You’ll learn how to:
-
Configure your development environment
-
Connect to your RevPi
-
Deploy Python applications
-
Monitor I/O states in real-time
-
Use PiCtory for hardware configuration
-
Get ready to take your Python development on your Revolution Pi system to the next level!
Prerequisites #
Setting up the System #
Follow these steps to configure your system. For detailed instructions, refer to the Getting Started guide.
-
Power Up the RevPi Connect 4
▷ Connect the RevPi Connect 4 to a power source.
▷ Ensure it is connected to your local network for accessibility.
-
Power Up the RevPi DIO
▷ Power on the RevPi DIO.
-
Verify Connections
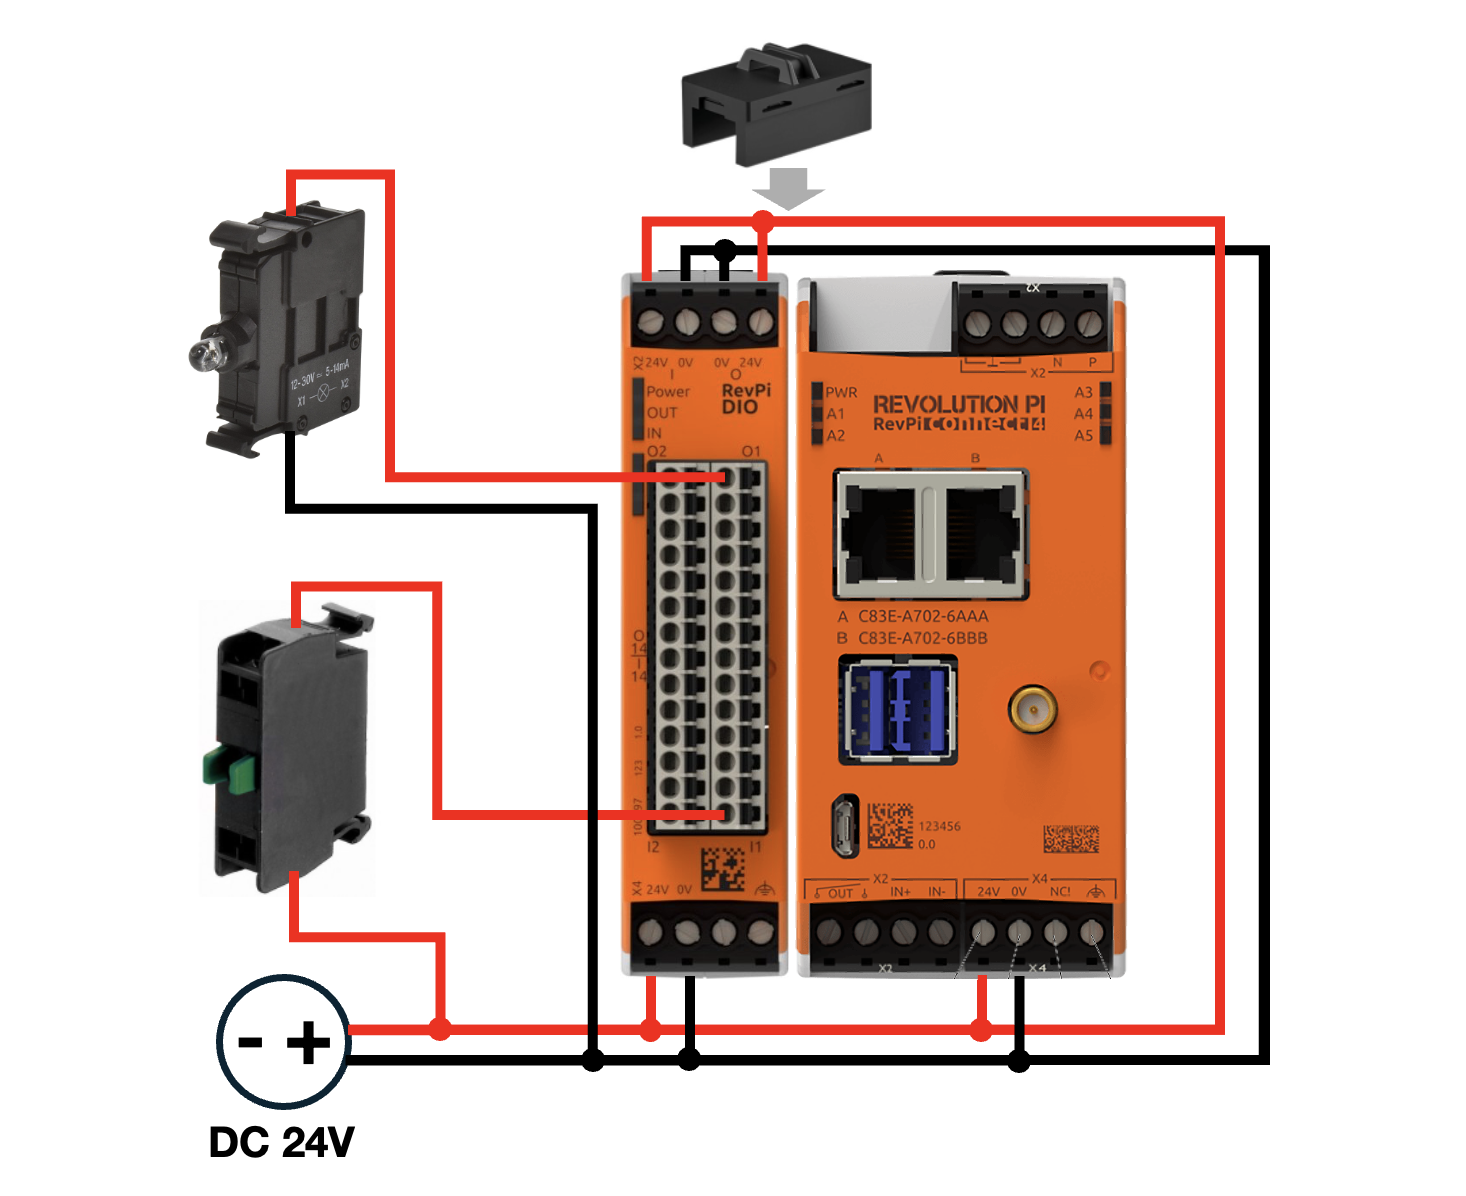
▷ Check that the button is properly connected to Input1 of the RevPi DIO.
▷ Ensure the LED is connected to Output1 of the RevPi DIO.
▷ Verify that the RevPi DIO is securely connected to the RevPi Connect 4 via the PiBridge interface.
-
System Diagram
Below is the diagram illustrating the connection setup. The button is connected to Input1 of the RevPi DIO, and the LED is connected to Output1. The button is used to toggle the LED on or off.
-
Access the RevPi Interface
▷ Open a web browser on a device connected to the same network.
▷ Access the RevPi system using its IP address.
|
Note
|
For network troubleshooting or determining the IP address of your RevPi, consult the Getting Started guide. |
Step 1: Configure the Hardware in PiCtory #
Step 2: Install and Start RevPi Commander #
-
Install RevPi Commander
Download and install the software on your PC. Refer to the installation guide. -
Open RevPi Commander
Launch the software on your PC. The interface will open as shown below: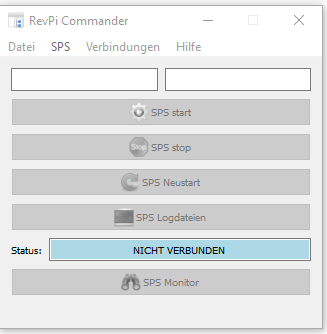
Step 3: Connect to RevPi Connect 4 #
Ensure Network Connection #
-
Verify your RevPi is connected to the same network as your PC.
Scan for RevPi Devices #
-
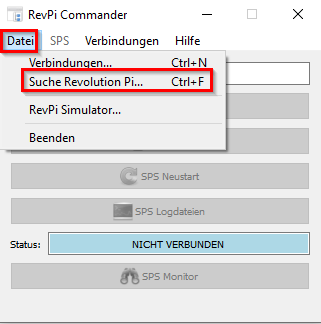
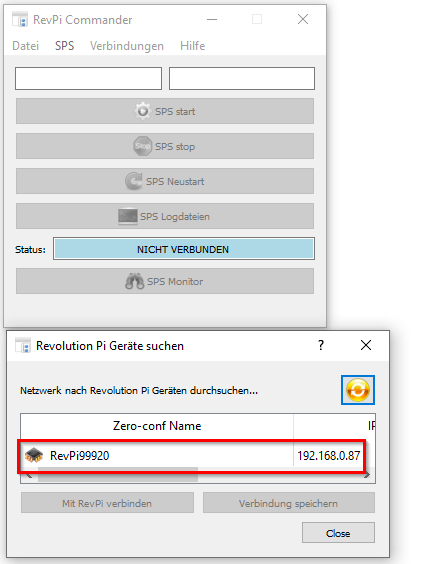
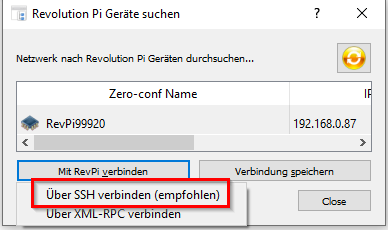
RevPi Commander automatically scans for connected devices. To manually scan:
▷ Go to File and select Search Revolution Pi.
Enter Login Credentials #
❯ A new window will open in which you must enter your login details.
▷ Enter your RevPi’s username and password in the prompt.
Confirm Connection #
-
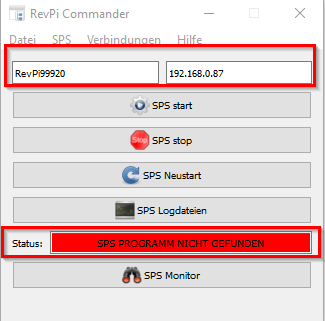
After successful login, the RevPi Commander interface will display the device status. If no control program is uploaded, the interface will show no program status:
Step 4: Upload and Run a Control Program #
Open the PLC Developer #
-
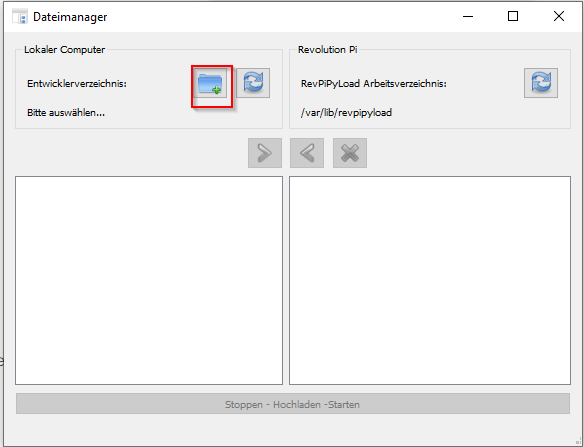
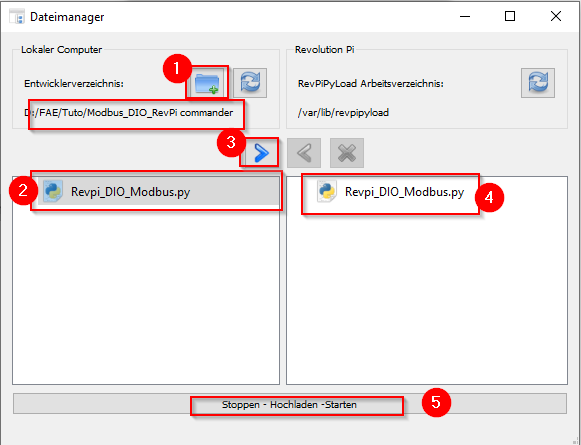
In RevPi Commander, go to PLC > PLC Developer to access the file manager.
Select Your Control Program #
-
In the file manager:
-
Navigate to the location of your control program.
-
If not already done, create a dedicated folder for your control programs.
-
Upload the Program #
-
Select your control program and select the right arrow icon to upload it to the RevPi.
Run the Program #
-
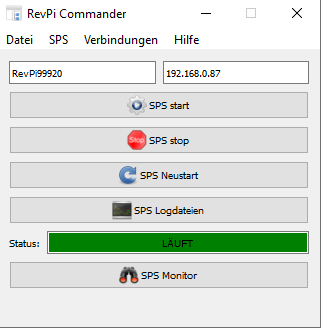
Once the upload is complete, select Stop-Upload-Start to run the program.
-
If there are no errors, the interface will display the following status:
Step 5: Use RevPi Commander Functions #
Configure Hardware with PiCtory #
-
In RevPi Commander, go to PLC > PiCtory Configuration to access PiCtory.
Reset Drivers #
-
Use the Reset Drivers option to resolve potential driver issues.
Access Log Files #
-
In RevPi Commander, go to PLC > PLC Log Files for operational logs and error troubleshooting.
Modify PLC Options #
-
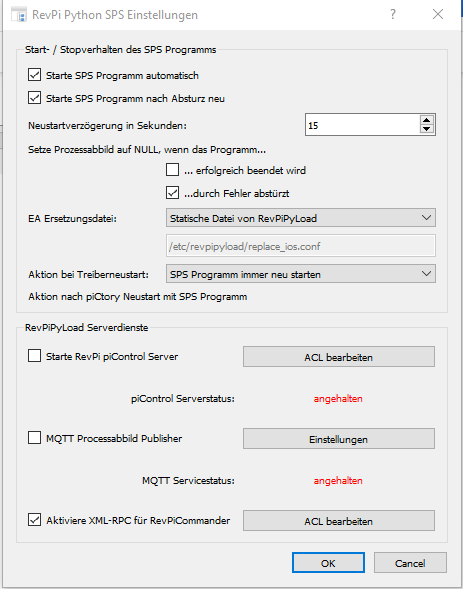
In RevPi Commander, go to PLC > PLC Options to do such a change like:
-
Selecting the default start program.
-
Activating or deactivating the software watchdog.
-
PLC Programm #
-
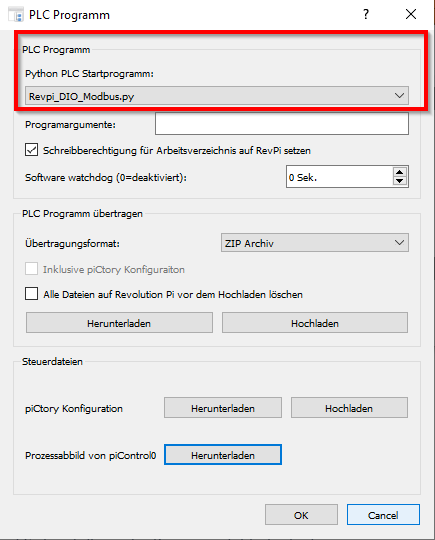
In RevPi Commander, go to PLC > PLC Programm to configure and manage your PLC program. The following options are available:
Key Features:
-
Select Python PLC Start Program:
-
Select the program to run on the RevPi.
-
Specify arguments for the program if needed.
-
Enable write permissions for the working directory.
-
Set a software watchdog (0 to disable).
-
-
Transfer PLC Program:
-
Select the upload format (e.g., ZIP Archive).
-
Include PiCtory configuration during the upload.
-
Optionally clear all existing files on the RevPi before uploading.
Available Actions:
-
Download: Retrieve the current PLC program from the RevPi.
-
Upload: Upload a new PLC program to the RevPi.
-
-
Manage Control Files:
-
PiCtory Configuration: Download or upload your hardware configuration.
-
Process Image: Download the current process image from piControl0 for verification or debugging purposes.
-
These settings help you define, upload, and manage the behavior of your PLC program on the RevPi system.
Step 6: Deploy a Python Script Using RevPiModIO #
Write a Python Script #
Create a Python script (e.g., Revpi_.py) with the following content:
import revpimodio2
import time

# Initialize the RevPiModIO object
rpi = revpimodio2.RevPiModIO(autorefresh=True)

while True:
    # Read the value of Input1 (button)
    button_state = rpi.io.I_1.value

    # If the button is pressed (assuming value 1 means pressed)
    if button_state == 1:
        # Turn on the LED by setting Output1 to 1
        rpi.io.O_1.value = 1
    else:
        # Turn off the LED by setting Output1 to 0
        rpi.io.O_1.value = 0

    # Print the button state and LED output value for verification
    print(f"Button state: {button_state}, LED state: {rpi.io.O_1.value}")

    # Wait for a short period before checking again
    time.sleep(0.1)
Explanation:
-
Input1 (I_1) is used to read the state of the button.
-
When the button is pressed (assuming it sends 1 when pressed and 0 when released), it will toggle the LED on Output1 (O_1).
-
-
Output1 (O_1) is controlled based on the button state:
-
If the button is pressed (I_1.value == 1), the LED will be turned on (O_1.value = 1).
-
If the button is not pressed (I_1.value == 0), the LED will be turned off (O_1.value = 0)
-
Upload the Script #
Execute the Script #
-
After uploading, select Stop-Upload-Start to run the script on your RevPi.
Monitor the PLC System #
-
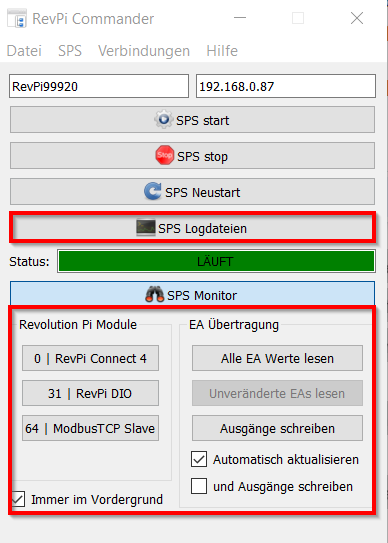
On the RevPi Commander homepage, view the system overview, including connected modules.
-
Check input and output status.
-
Verify module functionality and troubleshoot if needed.