System Configuration with PiCtory
The web application PiCtory creates and manages the configuration file of a Revolution Pi system, i.e. for a RevPi base module with expansion modules. The system configuration can be managed via a browser according to its physical arrangement on the DIN rail.
The configuration file is used to define which expansion modules are located at which position in relation to the RevPi base module and how all the inputs and outputs used are named and configured. The configuration file can also make this system setting available for other programs.
In addition to the physical expansion modules, virtual devices for common network protocols can be integrated.
Start PiCtory
Starting with the RevPi Bookworm image, PiCtory is started via the pre-installed Cockpit web application. Up to the RevPi Bullseye image, PiCtory is started via the RevPi Status web application, also known as Webstatus. See Query Device Information.
Start PiCtory via Cockpit (as of RevPi Bookworm Image)
▷ Establish a network connection between the RevPi and your PC.
▷ Open a web browser.
▷ Call up Cockpit via the web browser withrevpi[serial number].local
You can find the serial number of the RevPi on the front of the housing next to the QR code.
Alternatively, you can enter the IP address of the RevPi in the web browser.
❯ The warning NET::ERR_CERT_AUTHORITY_INVALID may appear in the browser.
▷ Accept the security exception to continue with the login.
❯ The login screen for Cockpit appears.
▷ Log in with user name pi and the device password.
You will find the device password on the sticker on the side of the RevPi housing.
❯ Cockpit opens in Limited access mode.
▷ Click on *Limited access *in the top main navigation bar to switch to Administrative access mode. You can only configure the RevPi with the elevated rights of this administrative access.Establishing a Network ConnectionIdentifying the IP Address.
▷ In the RevPi configuration menu, click the button for PiCtory.
❯❯ PiCtory opens in a new browser tab.
Start PiCtory via RevPi Status (until RevPi Bullseye Image)
▷ Establish a network connection between the RevPi and your PC.
▷ Open a web browser.
▷ Call up RevPi Status via the web browser withrevpi[serial number].local<br></br>You will find the serial number of the RevPi on the front of the housing next to the QR code.
Alternatively, you can enter the IP address of the RevPi in the web browser.
❯ The warning NET::ERR_CERT_AUTHORITY_INVALID may appear in the browser.
▷ Accept the security exception to continue with the login.
❯ The login screen for RevPi Status appears.
▷ Log in with the user name *admin *and the device password.
You will find the device password on the sticker on the side of the RevPi housing.Establishing a Network ConnectionIdentifying the IP Address.
▷ In the APPS tab, open the PiCtory web application via the START button.
❯❯ PiCtory opens in a new browser tab.
Arrange Devices (Device Catalog)
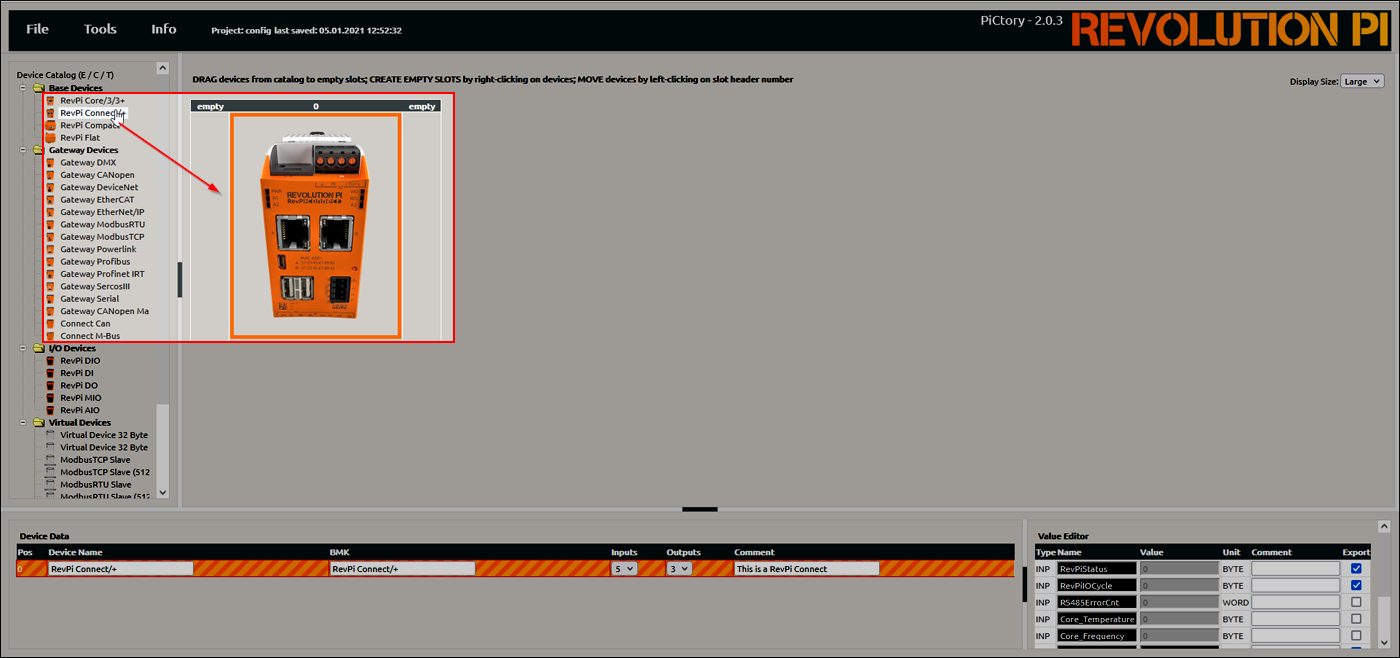
In the Device Catalog, all available RevPi devices and the virtual devices are listed.
On the Configuration Board, the individual RevPi devices of the Revolution Pi system can be arranged as they are physically arranged on the DIN rail, see Rules for the Arrangement of Devices.

▷ Select the RevPi base module from the Device Catalog and drag and drop it onto the empty slot with position number 0.
❯ PiCtory loads the selected base module onto the configuration board and creates new empty slots.
▷ Drag the other devices to the left or right onto the configuration board.
▷ The slots can be moved by clicking on the position number.
▷ Use Right-click > Delete to remove a device.
Basic Configuration of the Devices (Device Data)
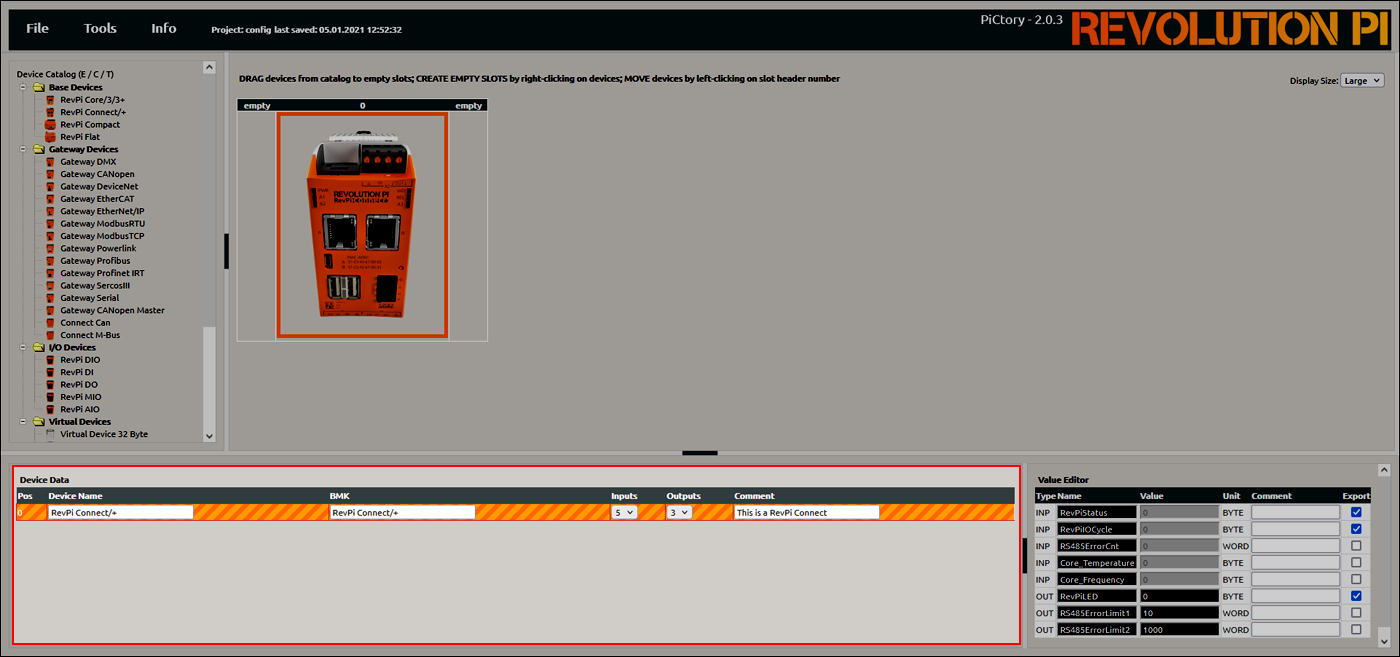
In the Device Data area, the basic settings for the device currently selected on the Configuration Board can be configured.
| Field | Description |
|---|---|
| Device Name | Change the device name if many devices are used and the system data is later processed in another program. |
| BMK | If necessary, specify the equipment identification number (German: Betriebsmittelkennzeichen). |
| Inputs/Outputs | Define data schema for the inputs and outputs. Choose the higher value for the boolean variable or the lower value for the 16-bit variable. |
| Comment | If necessary, use the comment column for additional information. |
If no values are entered, PiCtory uses the values stored in the RAP file.

Configuring Inputs and Outputs (Value Editor)
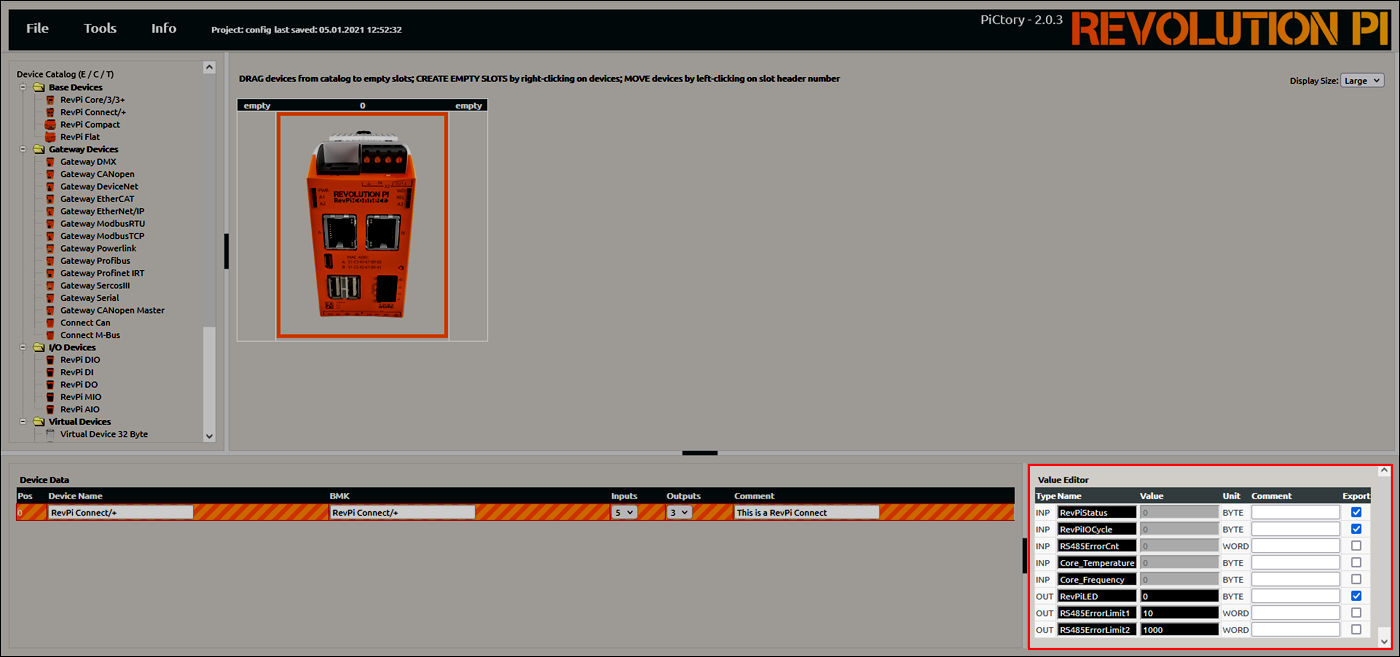
In the Value Editor, the inputs and outputs of the device currently selected on the Configuration Board are configured.
| Type | Description |
|---|---|
| Type INP | Values for the inputs |
| Type OUT | Values for the outputs |
| Type MEM | Values for the memory variables, e.g. operating modes of the inputs and outputs |
| Name | Name stored in the process image |
| Value | Value or mode |
| Unit | Unit of the value |
| Comment | Internal comment field |
| Export | Activate values for export via a communication interface (e.g., with MQTT) |

The configurable values differ depending on the RevPi device:
Configuring RevPi base modules
Configuring RevPi I/O Modules
Configuring RevPi Virtual Devices
Saving the Configuration
▷ Save the configuration as the start configuration with File > Save as Start-Config. The start configuration is called up directly after each boot process.
▷ Alternatively, use File > Save As to save the configuration as an additional configuration file on the RevPi base module.
▷ Restart the driver with Tools > Reset Driver.
❯❯ The Revolution Pi system is fully configured.
The configuration settings of the Revolution Pi system can be checked with pitest.
Opening Saved Configuration
▷ Select a configuration file with File > Open.
▷ Alternatively, use File > Load Start-Config. to open the configuration file stored as the start configuration.
Resetting Configuration
▷ Reset the configuration with File > Clear.
Exporting Configuration
The configuration file can be exported from PiCtory, e.g. to use it for other programs, for data backup or for simulation purposes.
▷ Export configuration with File > Export.
▷ Define file name and file format. Possible formats are:
- logiCAD3 ST GLOBALS
- Offset list .txt
- IBHSoftec symbol list
- CODESYS offset list
- LogicLab
▷ Export file with Download.
▷ Alternatively, display file with Show Only.
Reset Servicestats
Restarts all services such as RevPiPyLoad.
Reset Layout
Resets the layout of the PiCtory user interface to the factory settings.
Reset Driver
Restarts the RevPi driver piControl. The configuration saved in PiCtory is thus available for communication with the RevPi device.
Scan for Devices
Scans connected networks for accessible interfaces for Modbus on port 502.
Set Language
Set the language of the user interface in PiCtory.
User Settings
User settings for PiCtory:
- Activate / deactivateSession Timeout
- Activate / deactivateAuto Save
- ConfigureAuto Export
- Activate / deactivateCache for browser