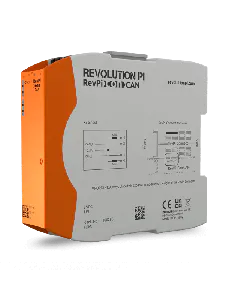
To integrate your own device into PiCtory, you need to create a device description file that tells PiCtory what properties your device has. This file is called a RAP file.
To create your own RAP file, you need the following tools:
- Text editor to create a RAP file (e.g. Notepad++)
- JSONLint to validate your RAP file. JSONLint is a freely available online tool. (http://pro.jsonlint.com)
We recommend that you copy an existing RAP file and use it as a template for your own file. In our tutorial we will do the same.
Let’s go!
- Go to “/var/www/resources/data/rap” on your RevPi Connect.
Copy the RAP file onto your PC or Laptop.
- Rename the copied RAP file. Here you have to follow some rules:
Structure of the file name:
[Name]_[Timestamp]_[Major Version]_[Minor Version].rap
Example: Toaster_20170519_1_0.rap
- Open your RAP file in a text editor.
If you use Notepad++, you can switch the source language to JSON. Menu -> Language -> JSON.
- Go to JSONLint website.
- Copy the contents of the file from the text editor to the browser window and start validation by clicking the corresponding button.
Syntax
The syntax of RAP files is the JSON format.
All attributes that are available have been listed here:
- Tabular list of available JSON attributes
Make adjustments
Change the following attributes so that your RAP file does not overlap with the existing ones and no errors appear
- id
- a unique name that has not already been assigned in PiCtory e.g. “MyToaster”
- producttype
- e.g.: 32769
- Change the product type to a number greater than or equal to 32769. This area is intended for self-written RAP files which aren’t provided by us. The number must not already be assigned in PiCtory. So if you write multiple RAP files, just increment this number by one for each RAP file.
Add device to the device catalog
PiCtory has a tree structure with all known devices. To include a new device, you need to extend the following file:
/var/www/pictory/resources/data/catalog.json
So copy this file e. g. to a USB stick and open it with an text editor.
Duplicate a virtual devices line, e. g. this one here
{"key": "Virtual01_20160818_1_0", "title": "Virtual Device 32 Byte", "tooltip": "Virtual Device for user application with 32 Byte inputs and 32 byte output", "icon": "##GSD_ICON_PATHNAME##" },
Change this line so it matchs your RAP file, e.g.
- key: File name of your RAP file without file extension
- title: Appears in the list of configured devices
- tooltip: Appears when you point with the mouse to the device
- icon: don’t change
{"key": "Toaster_20170519_1_0", "title": "My Toaster", "tooltip": "Virtual Toaster", "icon": "##GSD_ICON_PATHNAME##" },
Save file and validate it by using JSONLint.
You can add a nice icon to your virtual device, which will appear in PiCtory. For this you can use the following file as a template:
/var/www/pictory/resources/images/devices/Virtual01.png
So, for example, copy this file to a USB stick and open it with an editor and save it under a file name that corresponds to the “id” attribute of your RAP file, e.g. MyToaster.png
Import new files
Important: Please make a backup of the files or your system before importing the files, so that you can restore an executable system in case of error.
If the files are syntactically correct, you can copy them back to your RevPi. In our example, these three files are:
- /var/www/pictory/resources/images/devices/MyToaster.png
- /var/www/pictory/resources/data/catalog.json
- /var/www/pictory/resources/data/rap/Toaster_20170519_1_0.rap
Test your device
Open PiCtory and check the list of devices. You should now see your new virtual device.