Configuring Analog Outputs

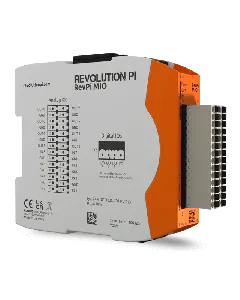
You can use PiCtory to configure your RevPi MIO. In this chapter we will describe in more detail the setting values of the “Value Editor” for the analog outputs.

Your RevPi MIO has eight analog outputs. Here you can output voltages in order to use actuators such as frequency converters for speed control, for example.

To ensure your configuration works it’s important that your devices are connected to the right output pins.

Requirements:

  • You have installed a web browser on your PC (e.g. Chrome or Firefox).
  • Your RevPi Connect and RevPi MIO are connected via the PiBridge.
  • RevPi Connect is in your network.

Let”s go!

  • Open your web browser.
  • Enter the IP address of your RevPi Connects in the address bar of your browser.
    The login window opens.
  • Log in with the username “admin”.
  • Enter your password. You will find this on the sticker on the side of your RevPi Connect.
  • Click on “Login”.
    You will now see the current device status of your RevPi Connect.
  • Click on the “Apps” tab.
  • Click on the start button behind the entry “PiCtory” to open PiCtory.
  • PiCtory opens.
  • Select your RevPi Connect from the Device Catalog.
  • Drag and drop your RevPi Connect on to the Configuration Board.
  • Open the “I/O Devices” folder in the Device Catalog.
  • Select the RevPi MIO.
  • Drag and drop the RevPi MIO into the empty slot on the Configuration Board, to the left of the RevPi Connect.
  • Define the basic settings for your adapters in the “Device Data” area. This entry is optional.  If you use a lot of devices and wish to process the data in another program later, then this entry can be very helpful.
  • Configure the outputs in the “Value Editor”. You will find the detailed setting values and descriptions of how to set the individual operating modes at the end of this chapter.
  • Click on “File>Save”. This saves your configuration.
  • Click on “Tools>Reset Driver”. This activates the changes for the adapter.
  • Do you want to continue using the settings in logiCAD3, Python or C? Then click on “File>Export”.
    A window opens. Here you can specify the format of the file and enter the file name.

Setting and Configuring Operating Mode

You can use the analog outputs in either one of the following operating modes.

Using Analog Output to Output Voltage

In the following example we will configure the first analog output to use to output voltage. You need this mode in order to use actuators such as setting elements or final control elements for controllers for example. To do this you will need to set the following values in the “Value Editor” in PiCtory:

AnalogOutputMode1 = analog Output

Analog Output 1 = Set the output voltage here. The value must be between 0 and 10000 and is stated in mV.

Using Analog Output as Digital Output

If you need more digital outputs, you can convert one of the analog outputs so that it behaves like a digital output. To do this you will need to set the following values in the Value Editor in PiCtory:

AnalogOutputMode1 = LogicLevelOutput

OutputLogicLevelVoltage 1 = Set a fixed output voltage here. The value must be between 0 and 10000 and is stated in mV.

AnalogOutputLogicLevel_1 = Here you can set the digital output to low (0) or high (1).

List of the Setting Values for the Analog Outputs in PiCtory

This is a summary of all the setting values for the analog outputs.

PiCtory setting

Values

Function

AnalogOutputMode_1-8

analogOutput: You can use the connection as an analog output.

LogicLevelOutput: You can use the connection as a digital output.

Set the function mode for the analog output here.

analogOutput 1-8

0-10000

Set the voltage that the respective analog output should deliver in mV here.

OutputLogicLevelVoltage 1-8

0-10000

Set a fixed voltage that the respective analog output should deliver in mV here.

If a value other than 0 is entered for analogOutput_*, this is the voltage that will be delivered at the output.

AnalogOutputLogicLevel_1

o: low

1: high

If you are using the output as a digital output (function mode = LogicLevelOutput), here you can set the individual digital outputs to high or low.